WebRTC WHIP ingest through OBS
Summary
In this how-to guide you will learn the bare minimum needed to push WebRTC WHIP to MistServer. What protocols should be set up within MistServer and what to select within OBS to start your push.
Push address syntax:
http(s)://mistserveraddress:http(s)port/webrtc/streamname
Requirements
- MistServer installed
- OBS installed
Steps we will take
- Protocol setup within MistServer
- Setting up OBS
- Example
- Common issues & fixes
Protocols to setup within MistServer
WebRTC input only needs 2 protocols set up, the HTTP protocol and WebRTC. HTTPS is optional and can be used alongside or as replacement for HTTP.
HTTP can be used with its default configuration. This would be using tcp port 8080. You can set this up or make changes through the protocol panel.
WebRTC can be set up using the same protocol panel, it will automatically use HTTP and/or HTTPS depending on availability. WebRTC has two important optional parameters you will likely want to set: UDP bind address (internal) and UDP bind address (public).
Internal UDP bind address
This selects the network interface to listen for incoming WebRTC UDP packets on. Which can change depending on your usage. By default MistServer takes the originating address as bind address, which means that if a connection comes in, it'll use that interface for the WebRTC connection. This can be left as is unless you will be using a (reverse) proxy.
If you have a reverse proxy active the easiest is to bind to 0.0.0.0 instead. Binding 0.0.0.0 means all interfaces and you will be sure that the interface won't be a problem. It technically could mean you'll limit the amount of total connections you can to several tens of thousands, but that is probably not a concern for most.
External UDP bind address
This configures the address that is passed to the end-user/client to connect to. By default this will bind to the address the HTTP(S) request was for. That once again means that it's fine unless you use a (reverse) proxy or some other non-default network setup. This field may be either an IP address or a host name.
Generally you will want to set this to the IP address (or hostname) your server can be reached as over the public internet.
Setting up OBS
Setting up OBS to push WebRTC WHIP is so easy it's almost trivial. The only thing to keep in mind is that you will be forced to specific audio and video codecs. Currently we will recommend using H264 for video and Opus for audio. If your selection isn't compatible with WHIP when you select it as an output OBS will automatically warn you and ask if you want to change it.
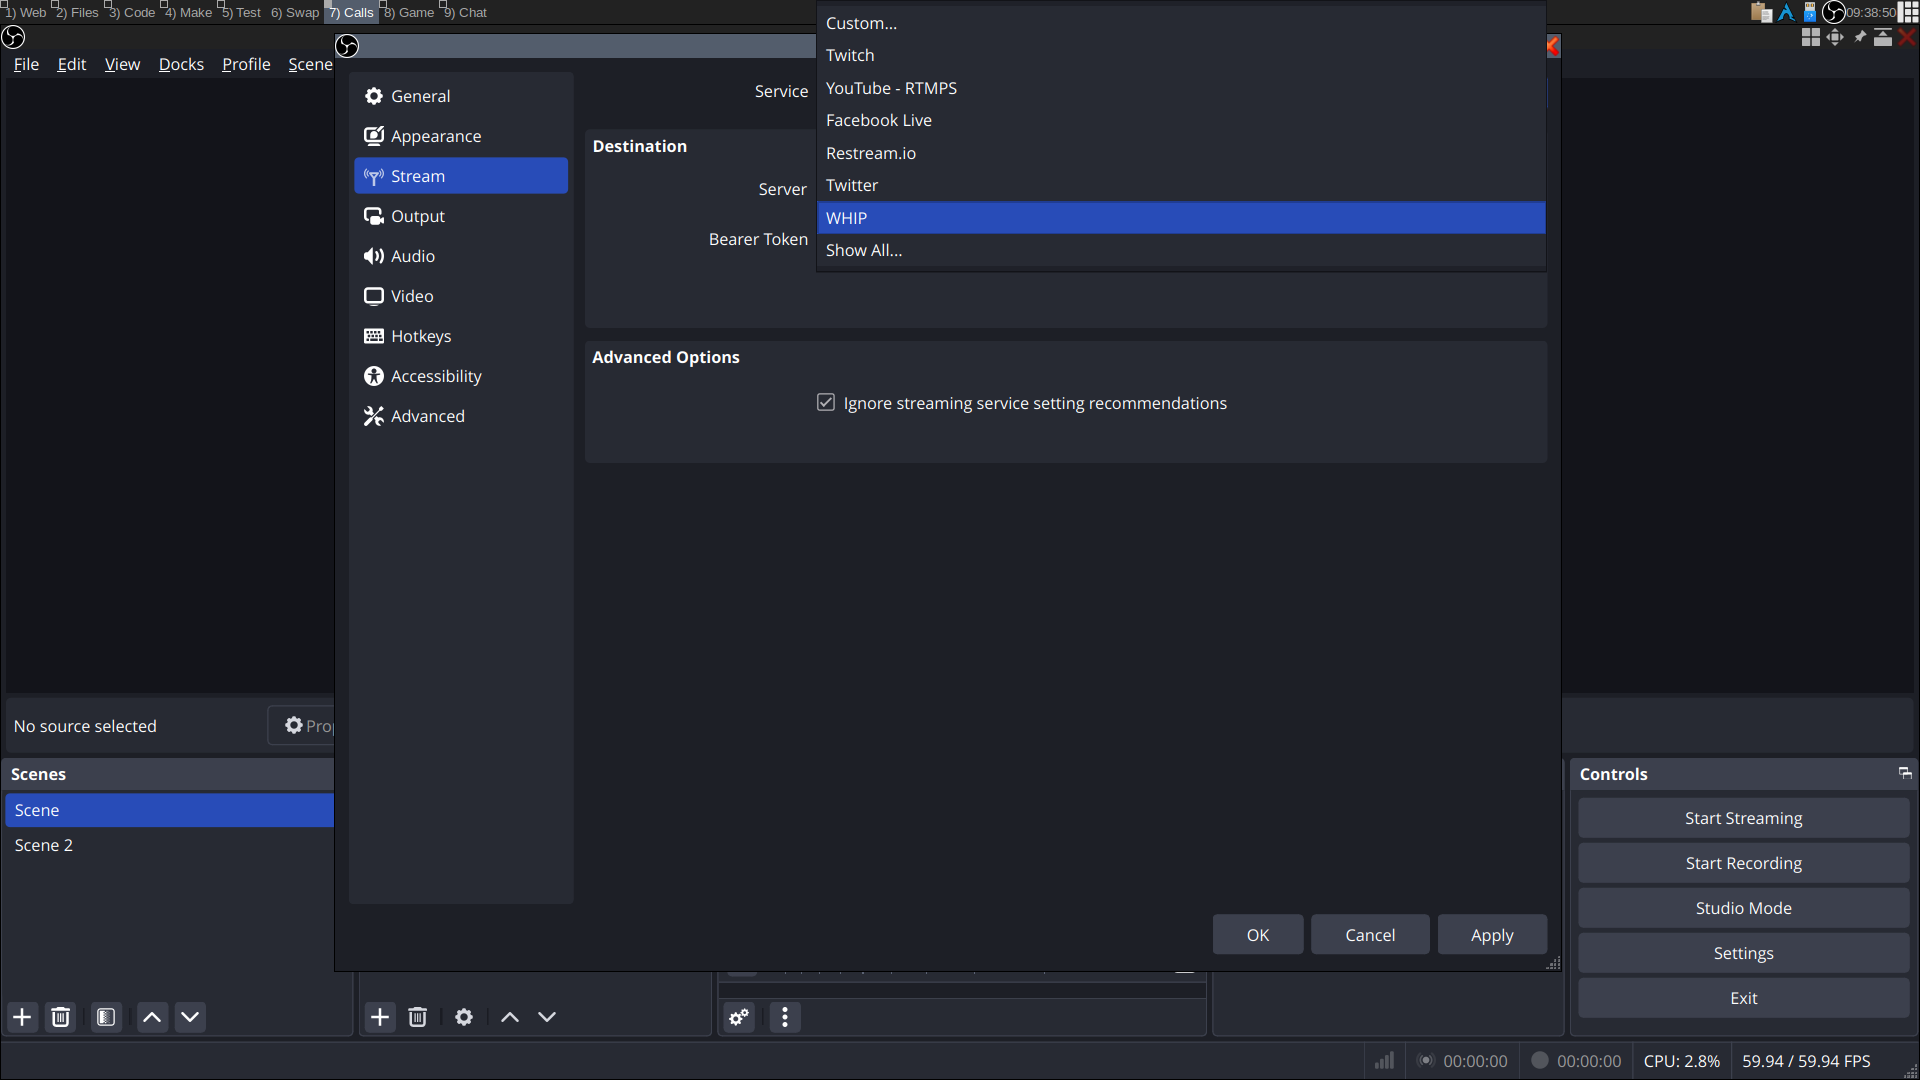
Selecting WHIP output
All you have to do is go to settings -> stream and select WHIP as service:
Chances are you are already using H264 for video, however audio is most likely set to aac and not to Opus, in that case you will get a warning:
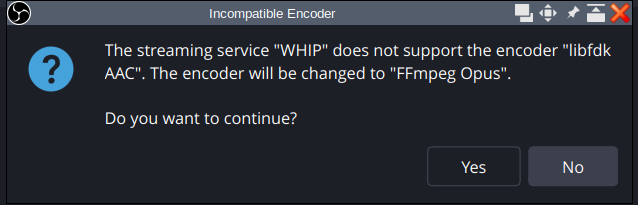
If you want audio you will want to accept changing to Opus for audio.
Setting up the correct push url
WHIP is slightly different compared to RTMP when pushing to MistServer in that your stream key is included in the URL. So instead of an URL and stream key you only set an URL.
The syntax for pushing WHIP to MistServer will be like this:
http(s)://mistserveraddress:http(s)port/webrtc/streamname
That's it, you just need to start streaming once set up!
Example
To give you an example we will show both a HTTP and HTTPS push towards our test server. We will be using the following configurations:
- Server:
example.com - http port:
8080 - https setup: proxy
- https address:
example.com/mist/ - stream name:
whip
Stream configuration
The following stream is set up:
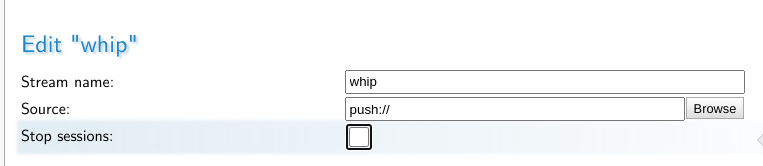
- Stream name:
whip - source:
push://
This allows us to push towards the stream whip from any address using a push method. If the WebRTC protocol is configured that is all we need.
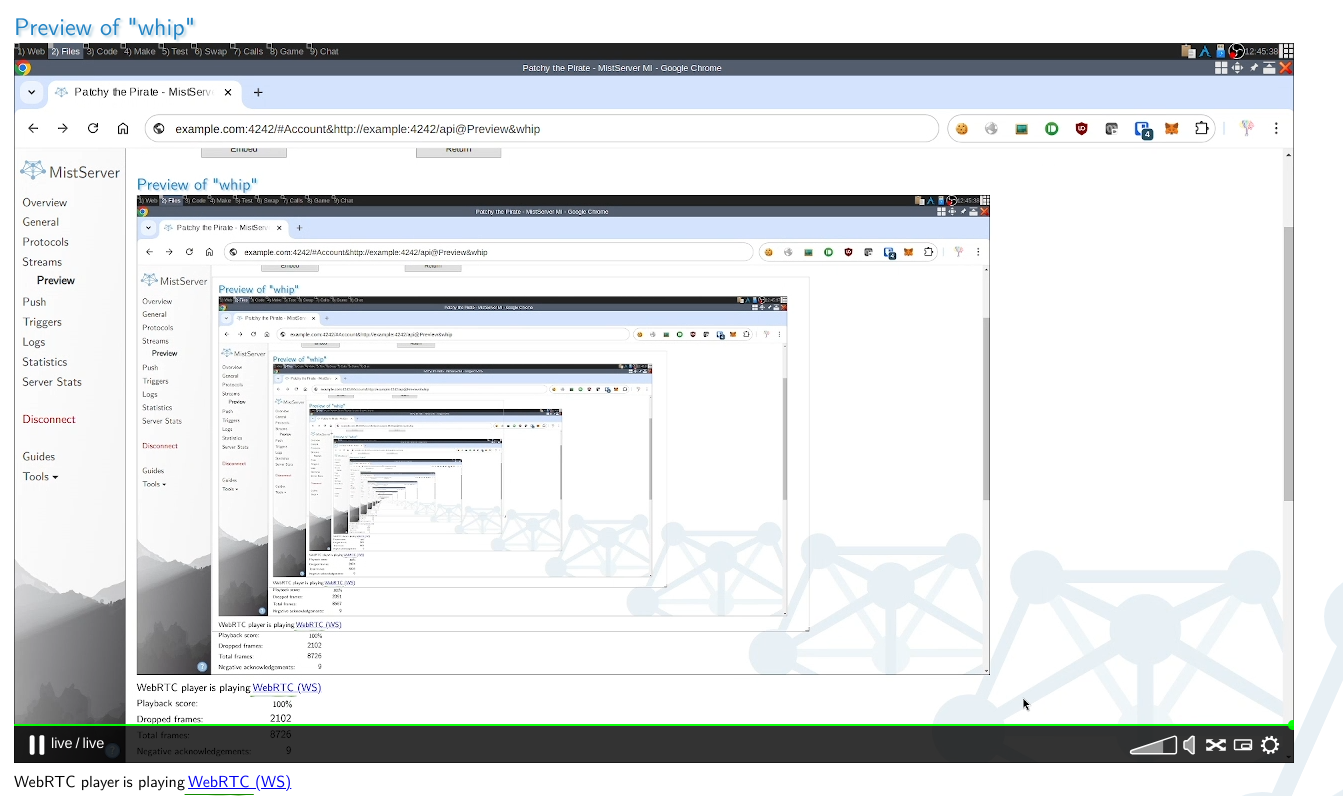
HTTP push url
Our server can be reached over HTTP using http://example.com:8080 we can send towards the following push url:
http://example.com:8080/webrtc/whip
Start streaming and you will see your stream go live.
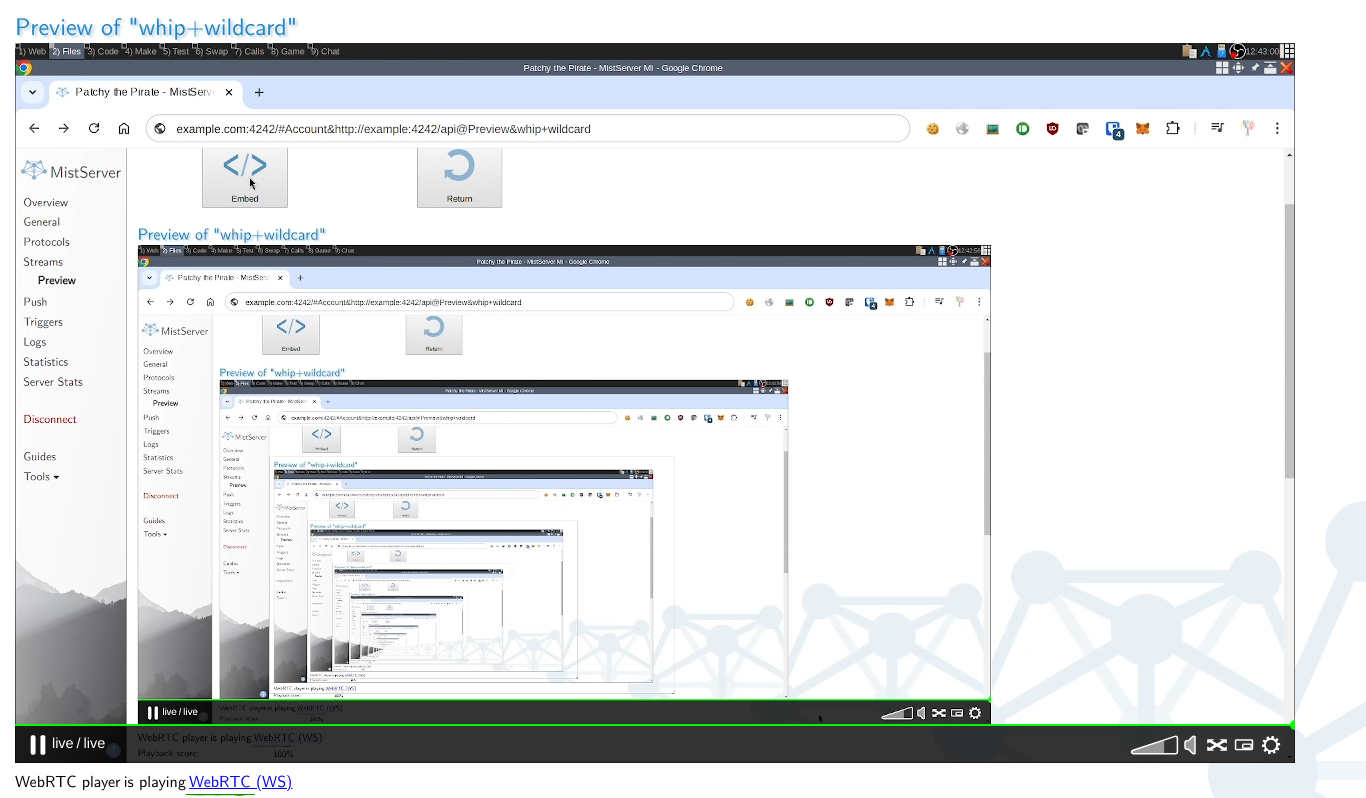
HTTPS push url
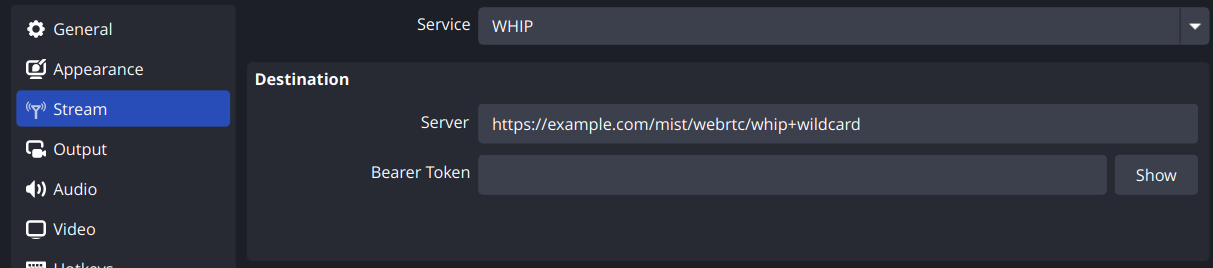
Our server is available behind a reverse proxy setup, which makes HTTPS available on the following address: https://example.com/mist/. This means that the push url changes slightly for HTTPS:
https://example.com/mist/webrtc/whip+wildcard
This time we will also be adding a wildcard to the stream, to show this works just like any other push input.
Common issues and fixes
When it comes to pushing WebRTC there's several things that can go wrong and it's not always clear what the problem might be. We'll be providing a few situations and how to resolve them here.
WebRTC cannot connect to the server
This is common and not always clear as to why. We would suggest the following steps to figure out where the problem lies.
Step 1: Check MistServer configurations for HTTP, WebRTC (and HTTPS)
Always check if the relevant protocols are set up. You will need HTTP and WebRTC for connecting over HTTP and HTTPS and WebRTC for HTTPS. If you want to double check the HTTP or HTTPs is working you can use a browser to connect to just the HTTP or HTTPS address. You will get an unsupported media type message if it is available. You can also try the WHIP url in a browser, you will get a message that only WHIP and WHEP are supported, which means that everything is set up correctly.
Step 2: Ping the server
You can ping a server using any terminal and using the command: ping address where address is the address to ping.
The first step is to see if you can actually reach the server that needs to receive the WebRTC feed. Ping the server and see if the messages reach the other end.
- Are your pings not getting a return? Your server is unreachable, you will need to check network settings or check for typos in the address.
Check the ephemeral range availability
The ephemeral range is a range of UDP ports that are used by WebRTC. Chances are if you can reach the server, but WebRTC still won't connect/work your ephemeral range is either fully or partially blocked.
Most Linux systems use a default range of UDP ports: 32768–60999
This is however very much OS dependant and can be changed. To check what ephemeral range your system uses you most likely will want to have the system report it to you. We recommend looking up how to do that for your OS specifically. For most Linux systems you can simply request it with:
sysctl net.ipv4.ip_local_port_range
A router or firewall is most likely blocking this, check those and make this range available for your server
Connections work Sometimes
Same answer as above, most likely your ephemeral range is being partially blocked and you sometimes get a port that is available and sometimes get a port that is not. Check the ephemeral range and see if this is made available within your router or firewall.
Alternatively you can limit the ephemeral range to a smaller range, however keep in mind that other tasks use these UDP ports as well. So you don't want to go too small.
Look up on how to change the ephemeral range for your system, most likely you can do it with:
sudo sysctl -w net.ipv4.ip_local_port_range="LOWERBOUND UPPERBOUND"
Where the numbers given for LOWERBOUND and UPPERBOUND will become the range that is available.
Stuttery or "bad" playback
If your stream is full of corruption, stutters or other messy playback chances are your internet connection simply isn't good enough to handle the quality. You can try lowering the bitrate to make the stream easier to handle, or simply switch another protocol. While WebRTC is definitely fast, it's not necessarily the best option for crisp images and smooth playback. The focus is fast and you will get some quality drop because of it.