JWT example for MistServer
MistServer 3.9 comes with JSON Web Token support (JWT). For those unaware, JWTs are a method to securely exchange information between two parties using JSON data. This data can be used to validate requests, such as creating a stream, pushing into MistServer and viewing back a stream. The high compatibility with JWTs with other solutions allows you to add current solutions as an access control within MistServer.
We are planning to add other options such as automatically logging into the API, however those will be added at a later date.
For more information on JWT please look at the JWT documentation
For those that would prefer an example please look below.
Setting up JWT within MistServer
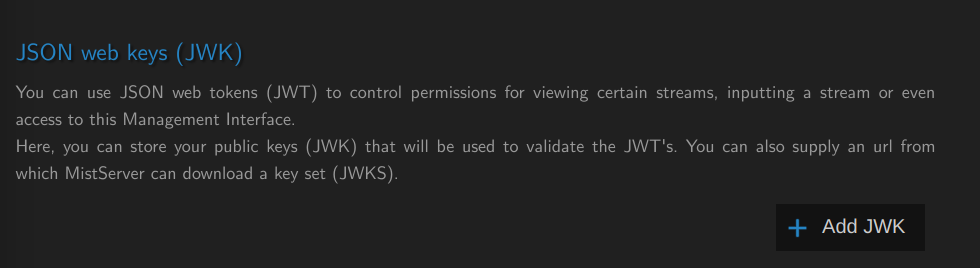
To use JWT you will need to add the JSON Web Key (JWK) to MistServer, this is the information MistServer uses to verify and validate a JWT being send to MistServer. JWK can be added to MistServer from the general fields, or through the API call jwks.
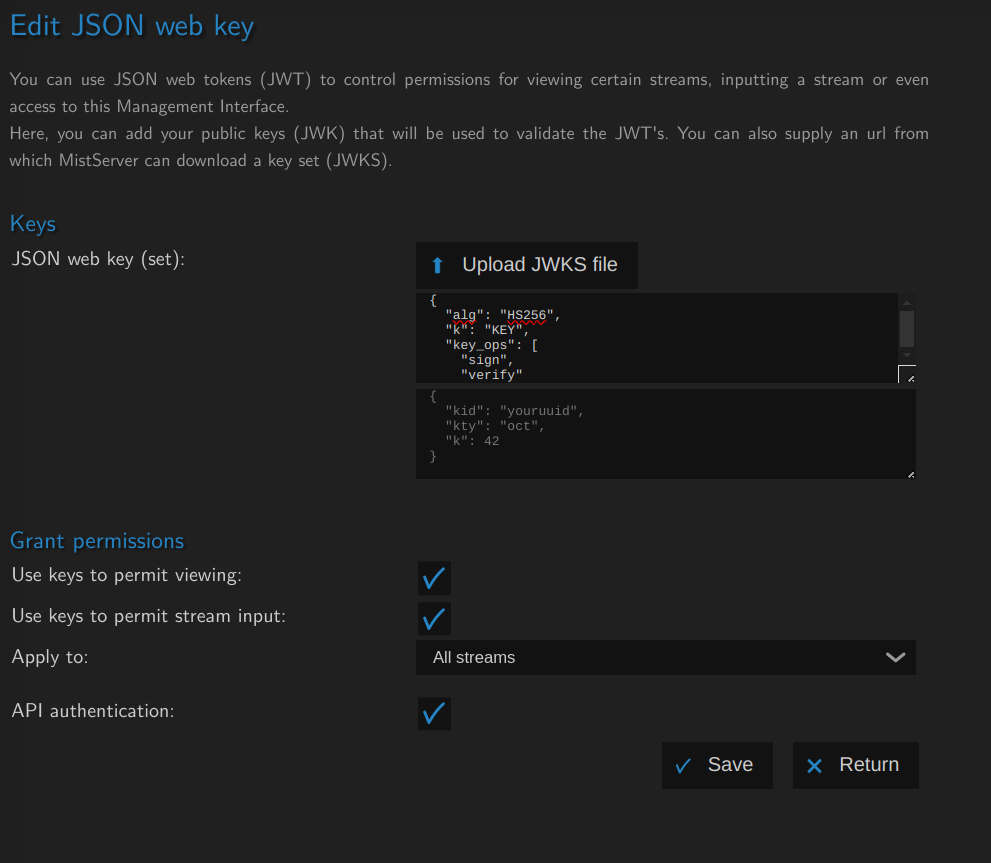
{"jwks":[[{"alg":"HS256","k":"KEY","key_ops":["sign","verify"],"kty":"oct"}, {"input": true, "output": true, "admin": true, "stream": ""}]]}
Currently JWKs should be signed as HS256 to be used with MistServer. You can set the following values:
inputtrue/false- Permission for pushing a stream into MistServeroutputtrue/false- Permission for watching a stream from MistServerstream""or["array","of","stream_names"]- limiting the permissions to all ("") or specific streams. The stream names given are the only ones pushable/watchable.admintrue/false- Permission to make changes within MistServers configuration. Currently non-functional, but will be added later on.
How to get a JWK
There's good applications out there that will help you generate a JWK, Keycloak is a fairly common one, however anything that can generate a JWK and JWT for you will suffice.
Generating a JWk can be done manually as well, though we would not recommend this method the real power with JWT and JWK lies in getting your permissions automated. That said for an example you could simply create a JWK and JWT through the jose.
Since we need to provide something that can be easily copied we will continue with jose.
Generating a JWK
First you will need to make a key that can sign JWTs, You can generate a key through the following command:
jose jwk gen -i '{"kty":"oct","alg":"HS256"}' -o mistkey.jwk
You can copy over the contents into the JSON web key creation field:
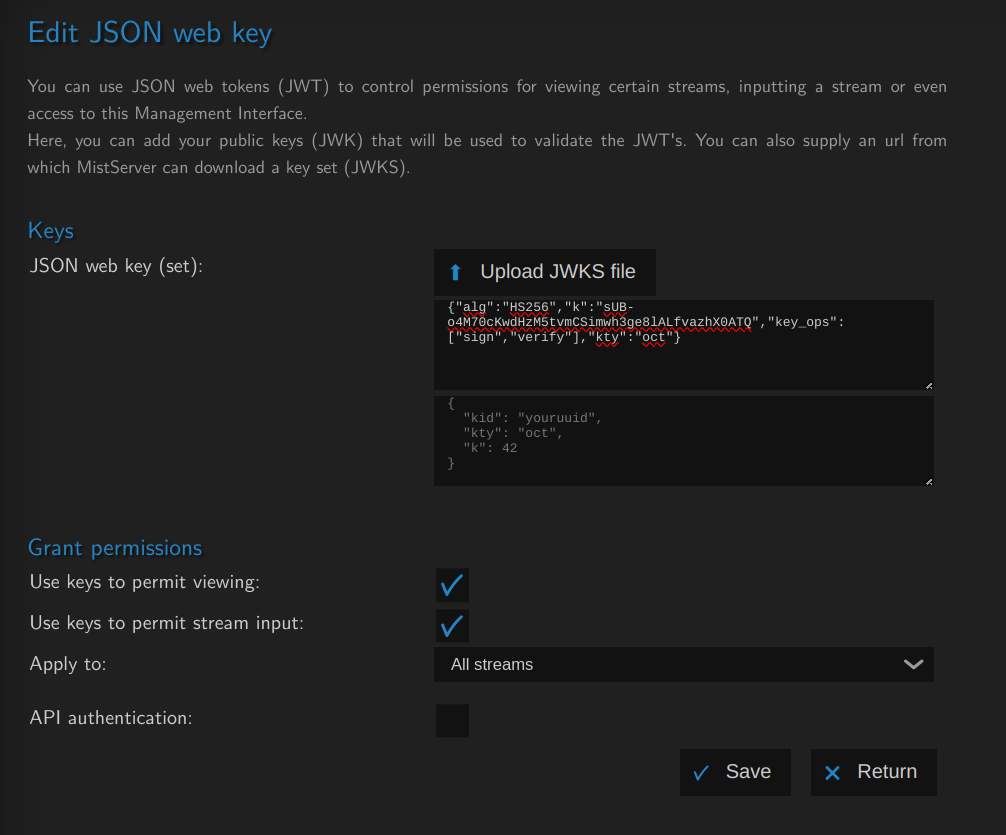
- You should be able to get similar JWK data from your chosen JWT application. Copy over that data or select the file/url where it is saved instead.
- While you do not have the save the mistkey.jwk, it will be handy to have done this when using it to generate a JWT
Generating a JWT
Required To generate a JWT you will need to use the JWK to sign off on it, however you will need to provide additional information such as:
sub- The subject (stream name) this token is about. This will determine the stream to watch or push.
In the case of a viewer, the JWT may be passed as the stream name or as a ?tkn=JWS url parameter or cookie. When it is a parameter the sub field may contain a * indicating that anything after is matched. Allowing for wildcard support when used as streamname+*.
In the case of a contributor (pushing a stream into MistServer), the sub field must contain the full streamname+wildcardname a * is not allowed.
Optional Optionally you can add extra fields to verify whether the JWT should still be valid, which is a good idea, however somewhat unnecessary in this example.
exp- Date in UNIX (seconds) at which the JWT is no longer valid and should be rejected.iat- The date at which the JWT was issued, potentially important for validation checksiss- The issuer of the JWT, this can be used to validate validity and is required in every JWT
When using jose the easiest way to use this is by creating a .json file:
echo '{"sub": "example"}' > example.json
If you're following this along with jose to get a feeling of using JWT remember that example should be where your stream name goes!
The above is the bare minimum to work with, however to make sure you know how it looks like if you add the other fields we'll add that example as well and will be using that further on as well.
echo '{"sub": "example", "iss": "Mist", "exp": 2147483647123123, "iat": 1}' > example.json
The above would allow someone with the previously generated JWK to push or watch the stream example up until the year 2038. The last step is creating the JWT itself:
jose jws sig -I example.json -k mistkey.jwk -c
This will return a long string in your terminal, for example:
eyJhbGciOiJIUzI1NiJ9.eyJzdWIiOiAiZXhhbXBsZSIsICJpc3MiOiAiTWlzdCIsICJleHAiOiAyMTQ3NDgzNjQ3MTIzMTIzLCAiaWF0IjogMX0K.tjRG-obkbh4P45PbLM86W8_bOyTZFLMdLajUmA1OF2w
This would be your JWT which you can use to push or watch.
Your own JWT will look similar, but not exactly the same.
Pushing with a JWT
It's important to note that any push with a valid JWT will be accepted whether this stream has been configured or not. If it's not configured the defaults for any live ingest will be used. This will mean that if you delete a stream, but forget to delete the JWT the stream will be re-created while the JWT is in use. Streams pushed in using a JWT will also bypass any other hooks/triggers/security within MistServer as it is assumed you have done so through the JWT and there is no need to double-check this ingest.
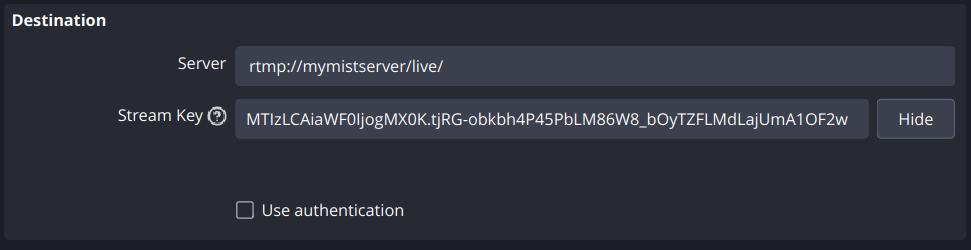
RTMP
Using a JWT with RTMP can be done simply by using the JWT instead of the stream key field when pushing.
SRT
For SRT you need to use the JWT in the streamid field:
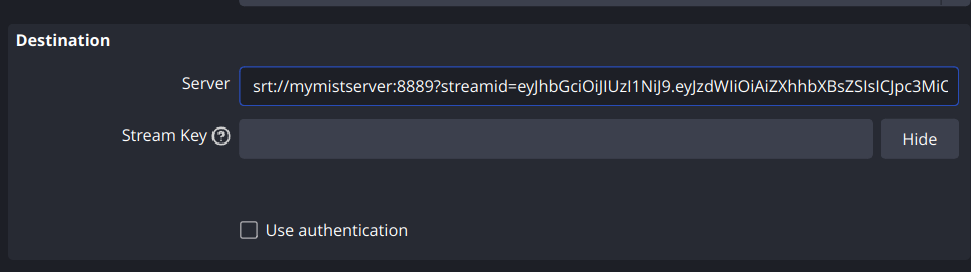
::: tip When you're using an SRT passphrase this will still need to be included! :::
WebRTC
For WebRTC you will want to use it as the streamname field:
 WebRTC demo
Watching with a JWT
Viewing through a JWT will bypass any other hooks/triggers/security within MistServer as it is assumed the JWT has already validated the user and there is no need to do a double-check. This allows a configuration where you block everyone and use JWTs to allow people access.
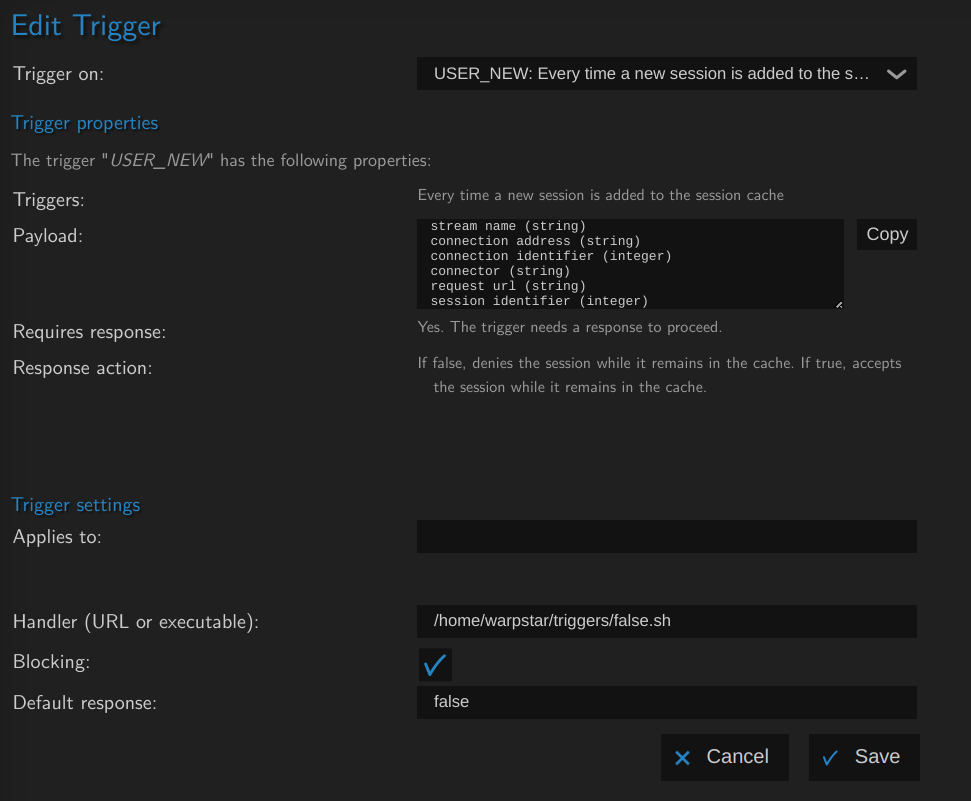
By default everyone can request streams from MistServer and watch them, to enforce JWTs you will want to first make sure users can no longer watch by default. This is easiest done by setting up a USEr_new trigger that sends false back to everyone
This is easiest done by setting up a false.sh that is executable and contains:
#!/bin/bash

echo -n "false"
Anyone attempting to watch will now be blocked:
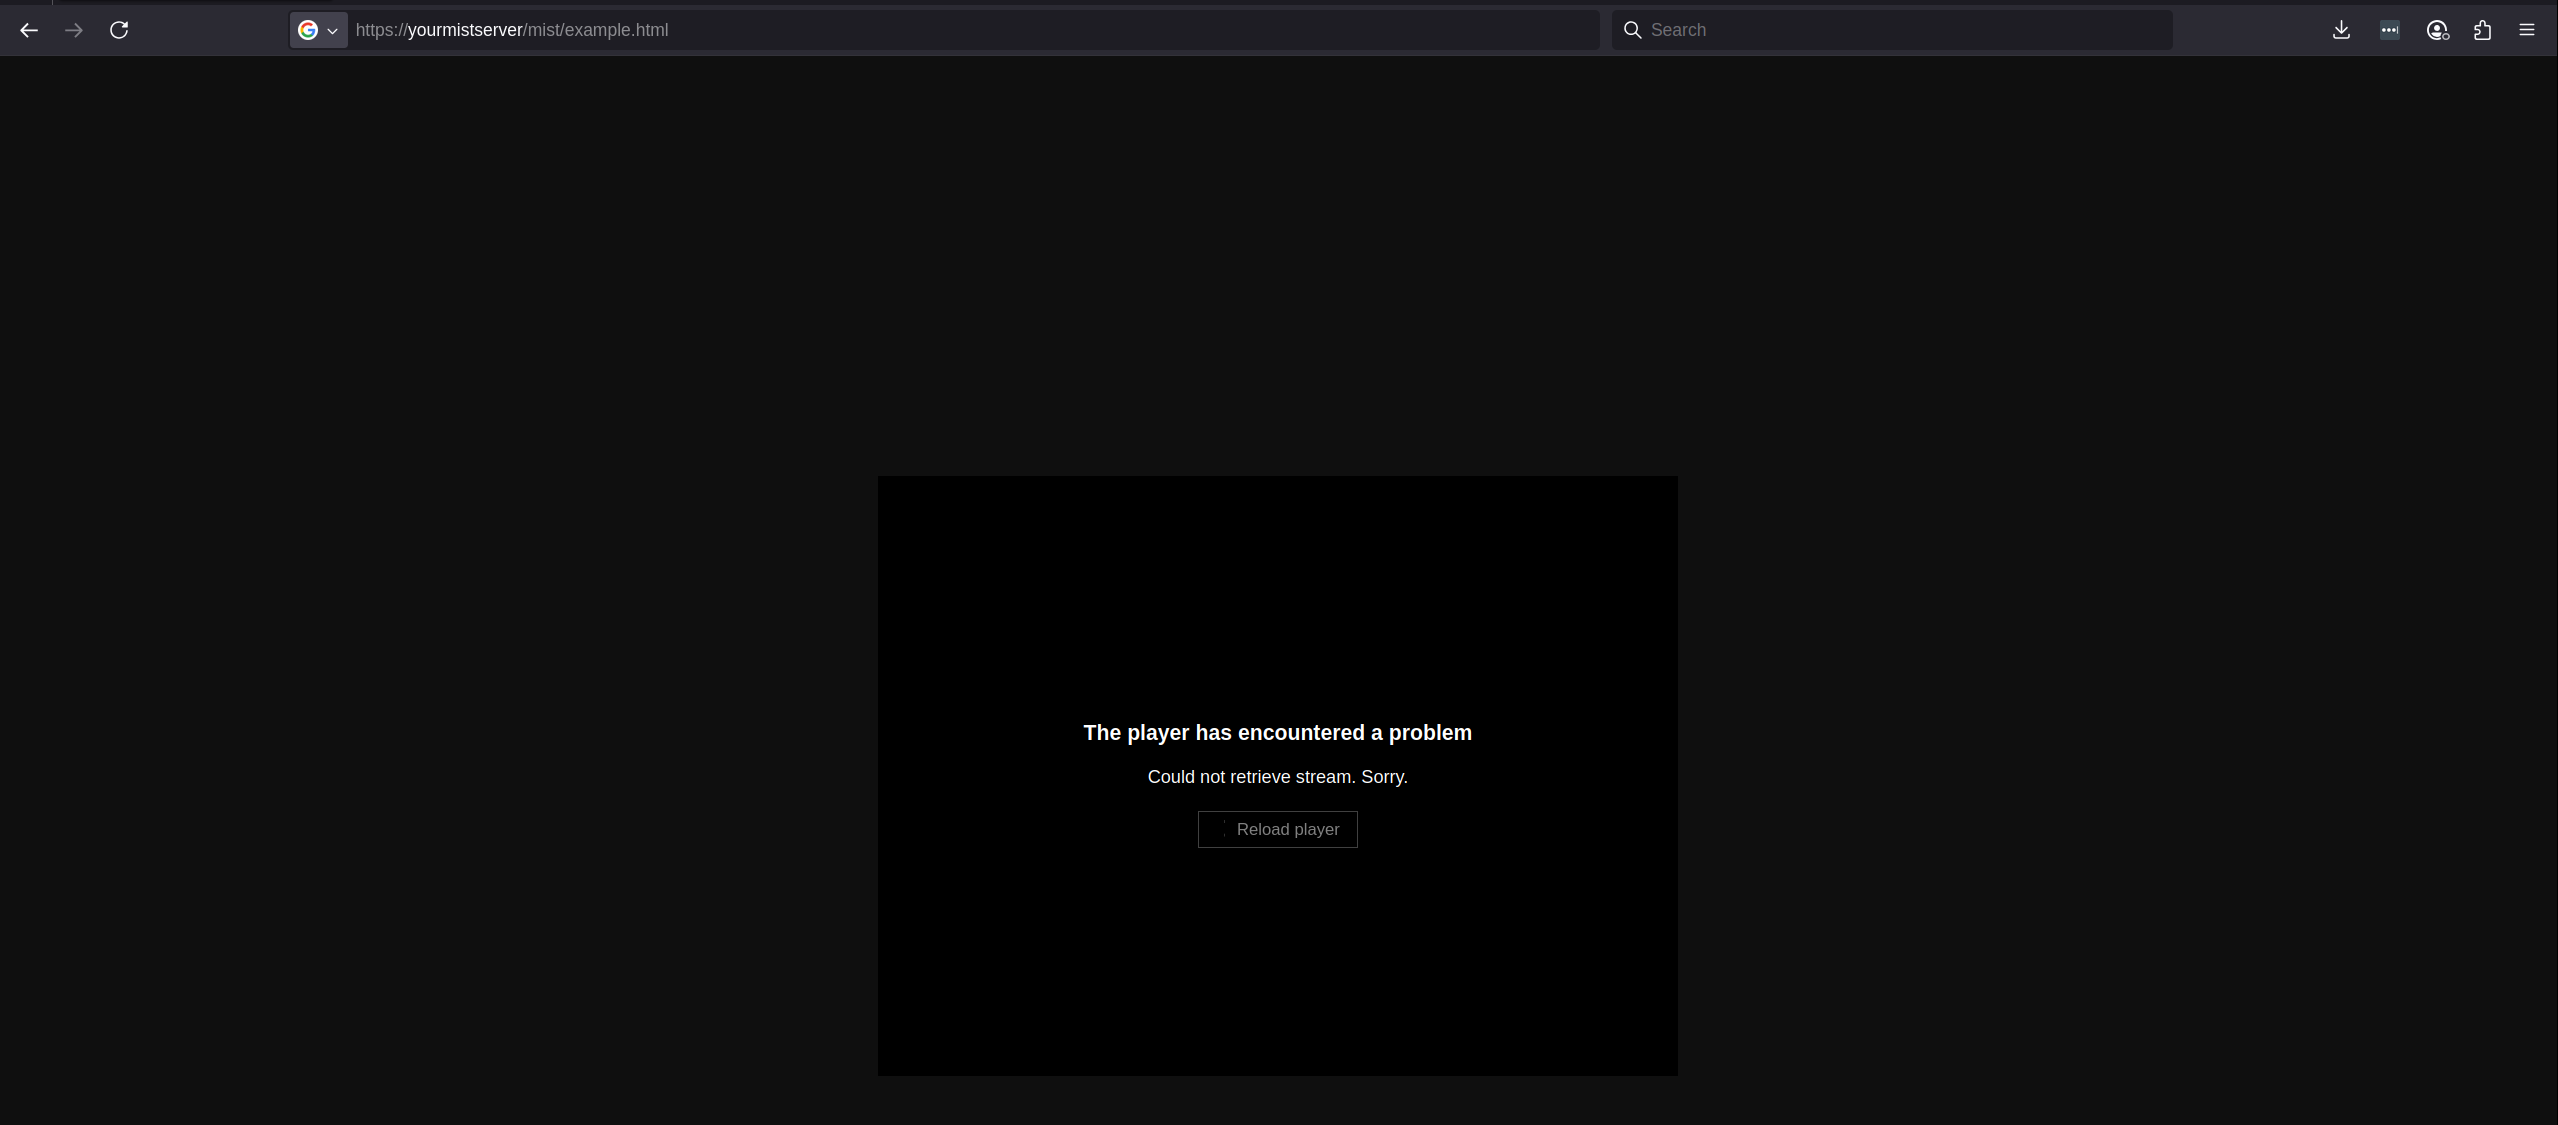
https://yourmistserver/mist/example.html
However if you add the JWT as a ?tkn=TOKEN parameter or as a cookie it will reach MistServer and be validated for playback. If you've done everything right you will be able to watch the stream.
 The full address above is:
https://yourmistserver/mist/example.html?tkn=eyJhbGciOiJIUzI1NiJ9.eyJzdWIiOiAiZXhhbXBsZSIsICJpc3MiOiAiTWlzdCIsICJleHAiOiAyMTQ3NDgzNjQ3MTIzMTIzLCAiaWF0IjogMX0K.tjRG-obkbh4P45PbLM86W8_bOyTZFLMdLajUmA1OF2w
This should not be a valid JWT for your setup, but it should give you the idea on how you can use it.
Keep in mind that if someone has been approved through a valid JWT this approval status stays up to 10 minutes after they disconnect or when the sessions get an invalidate sessions call